
How to Install and Host BTCPay Server
If you own a business and are looking to accept Bitcoin payments directly, you can do so with an open source cryptocurrency payment processor known as BTCPay Server. The BTCPay Server code is backward compatible with Bitpay’s API but is completely free.

What’s great about BTCPay is that, contrary to accepting crypto payments with Coinbase Commerce or the aforementioned BitPay, it is a non-custodial invoicing system which does not require a third-party to manage your funds – you are your own bank.
This tutorial focuses on a step-by-step guide to deploy BTCPay Server on any website using LunaNode. Please understand that doing while it is not very complicated, it is not a plug-n-play and requires a number of steps. Also, note that we cover web deployment through LunaNode in this method as the preferred method to deploy BTCPay Server. We also describe the general steps for the manual deployment of BTCPay Server on your own server but won’t be going into the weeds in this post.
If you utilize Azure, Docker, or Google Cloud, visit the BTCPay Server website for installation instructions. The site includes links you can follow for one-click installation.
Web Deployment with LunaNode
LunaNode is a Canadian web hosting company that already accepts Bitcoin payments. For under $10 per month, you can use them to host your BTCPay Server deployment and link it to your own website. They offer an easy and non-technical installation wizard.

To deploy BTC Pay Server through LunaNode, you must first set up a LunaNode account. Sign up for your LunaNode account and add credits to it. Then complete the following steps to set up BTCPay Server:
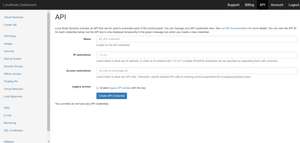
- Navigate to the API section and generate a new API.
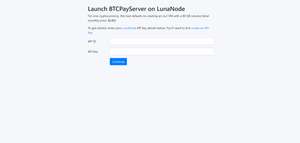
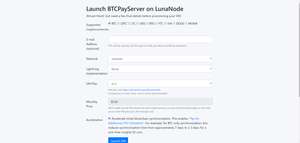
- Keep this page open and navigate to launchbtcpay.lunanode.com using a new browser tab or window.
- Copy the API key and ID from the previous page and paste them in here.
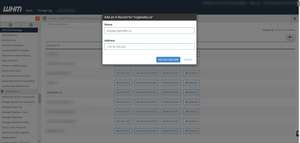
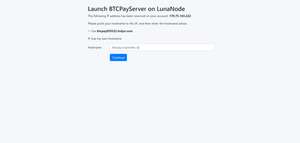
- Enter your website domain. If your site is hosted on LunaNode, it will generate a new domain for you. If you’re hosting elsewhere, you will need to point the hostname to the IP address provided by LunaNode. Below is an example where we added the hostname via WHM/cPanel:
- Next, LunaNode's Web Wizard will start. Use it to customize the settings for your website.
- Click Launch VM to start the Virtual Machine process. This can take between 5 and 10 minutes.
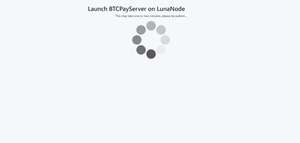
- When it's done, navigate your browser to your domain.
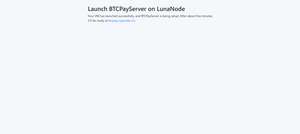
Once your browser hits your domain the LunaNode wizard will begin the sync process. Note that this will take a while due to the size of Bitcoin's blockchain. Depending on the LunaNode plan you chose and the number of credits you added, full sync can take up to seven days. If you are looking for something faster, add more credits or purchase a faster plan.

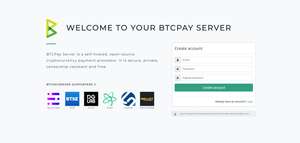
You can see the actual result of this tutorial on btcpay.cryptodev.ca where we followed the steps above exactly.
In our next tutorial on the topic, we will go ahead and link our newly deployed and installed BTCPay Server to an actual online ecommerce store and set it up to accept bitcoins as payment.
Manual Deployment on Your Own Server
For the more technical minded who want complete control, if you own a web server or rent a server from a third-party provider running Linux, you can deploy BTCPay Server yourself. The steps listed here are rather brief by design. It is assumed that you know what you're doing. If not, do not take the risk. Botching the installation could take down your entire server. BTCPay does not recommend using a manual deployment in production. You can find more information on BTCPay’s website here.
Here are the steps:
- Download and install the Bitcoin core in the /usr/local/bin directory of your server.
- Download and install .NET Core SDK 2.1.
- Download and install NBXplorer.
- Download and install BTCPay Server.
- Run bitcoind direct from the command line in the root directory of your server.
- Run NBXplorer, followed by BTCPay Server.
You should now be able to browse the BTCPay Server using port 8080. If everything went as planned BTCPay Server should immediately start syncing. Note that it could still take a while to finish.
These are the two methods for installing BTCPay Server without access to Azure, Docker, or Google Cloud. There is one more method listed on the BTCPay Server website: signing up with a third-party web hosting company that allows you to piggyback off their BTCPay installation. This option will cost you, but it is worth it if you can't make any of the others work.